Return to main page
Setup
ICDS-ACI Account TOP
ICDS-ACI Account
During the bootcamp, we will use the Interactive Desktop provided by the ICDS-ACI. This means you do not need to install any software on your personal computer prior to the bootcamp. To access the resources provided by the ICDS-ACI, you need to follow these steps:
-
For incoming graduate students, activate your PSU student account
-
Enable two-factor authentication for your PSU account
-
Request an ICDS-ACI account. Use the research description "2020 Data Reproducibility Bootcamp" and list PJ as your sponsoring account (ghp3)
Please do this as soon as possible since it can take a few days for the account request to process.
GitHub Account TOP
GitHub Account
You will need an account on GitHub for the section on version control. Please create one prior to the bootcamp.
During the workflowr section, you will use password authentication to communicate with GitHub. This is required to make the instructions the same for everyone. For any real workflowr projects you create in the future, you can customize workflowr to use your preferred Git/GitHub settings (e.g. SSH keys).
Because of this, please make sure:
-
You remember your GitHub password. You will need to type it out.
-
If you have configured two-factor authentication for your GitHub account, please temporarily disable it for Friday. If you don't disable it, you will need to generate a Personal Access Token and copy-paste this instead of your password (GitHub Instructions for authenticating with PAT).
Interactive Desktop TOP
Interactive Desktop
The bootcamp exercises will be completed on the ICDS-ACI Interactive Desktop dedicated to this bootcamp (BDR Desktop). Prior to the start of the bootcamp, please follow these instructions to confirm you are able to login and use the Interactive Desktop. Because this is a desktop environment running in your browser, copy-pasting is more cumbersome than usual, and will take some practice to get used to.
-
On the homepage of this website, click on the link to the Interactive Desktop.
-
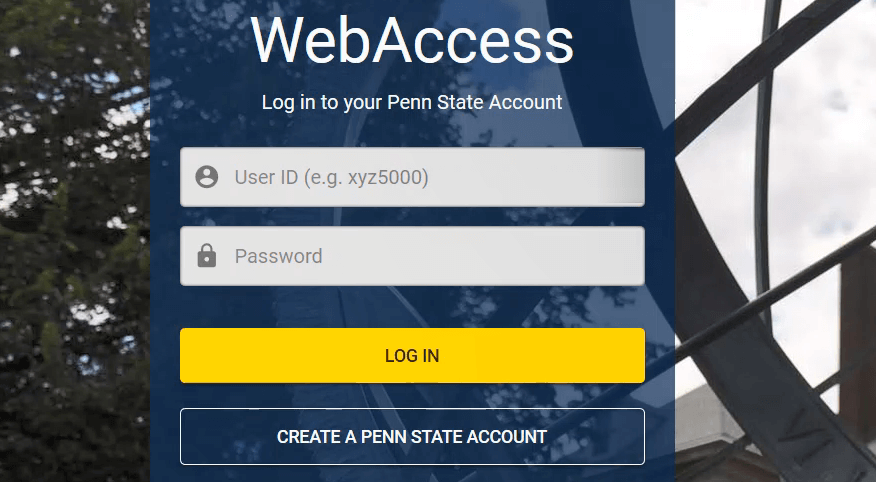
Login with your PSU User ID and password.
-
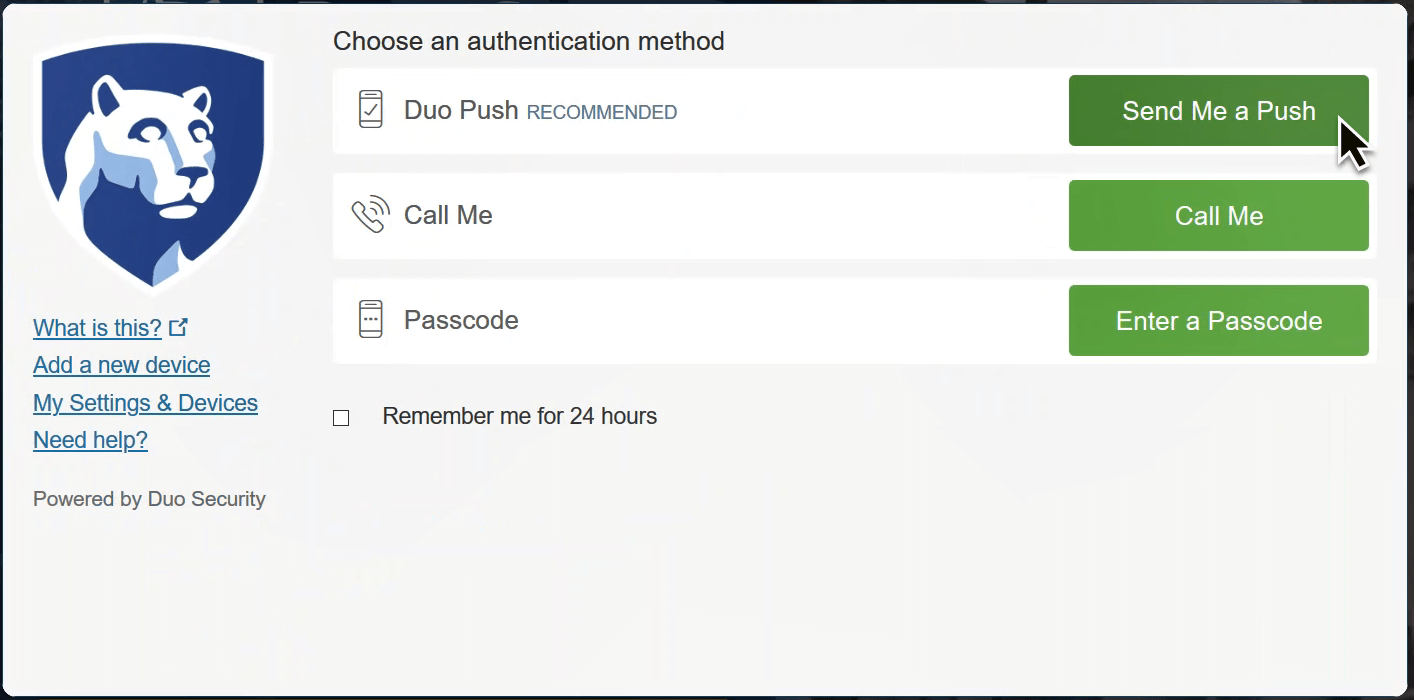
Authenticate with the two-factor authentication method of your choice. Recommended that you use Duo Push.
-
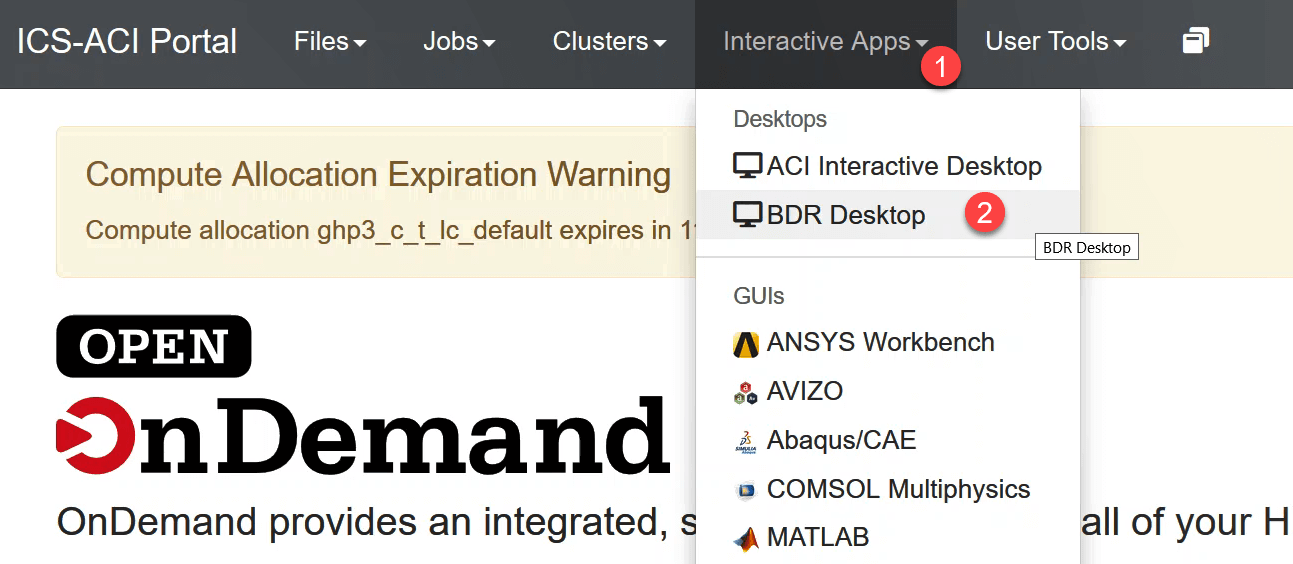
Click on the Interactive Apps menu in the navigation bar, and then choose BDR Desktop.
-
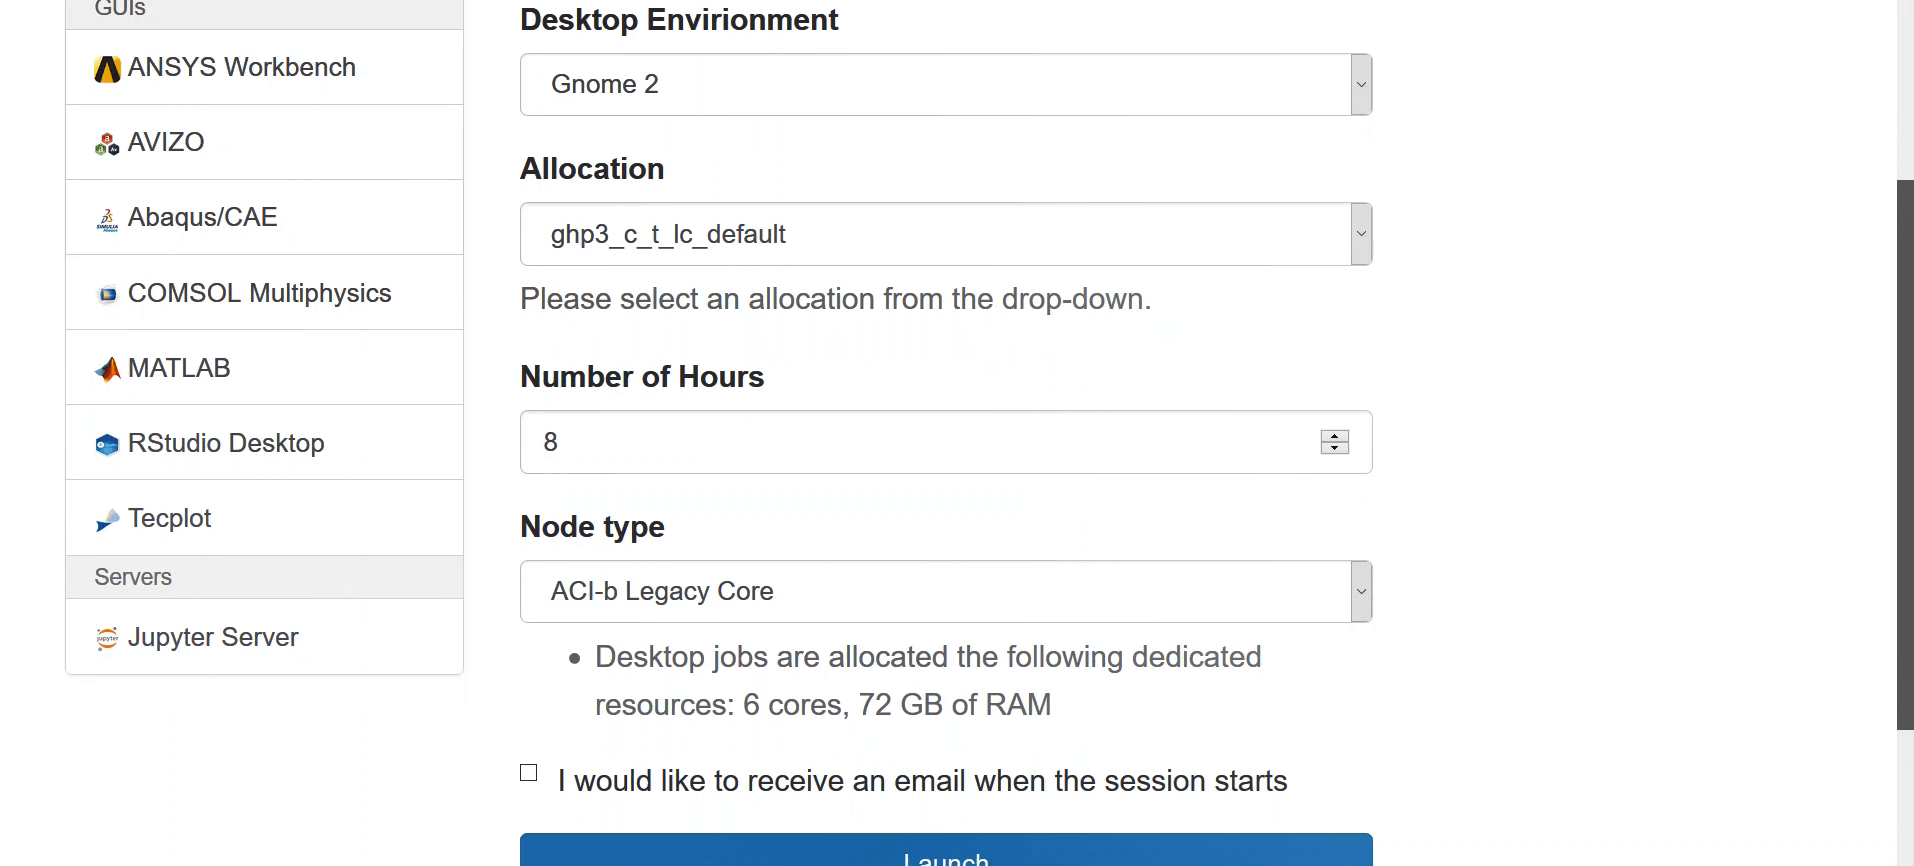
Configure the following settings and then hit the blue Launch button:
- Desktop environment: Gnome 2
- Allocation: ghp3_c_t_lc_default
- Number of hours: 8
- Node type: ACI-b Legacy Core
Note: During the bootcamp you'll want to choose 8 hours in order to avoid having to wait to launch another session. But for a quick test, choose 1 hour (this should also help it launch faster).
-
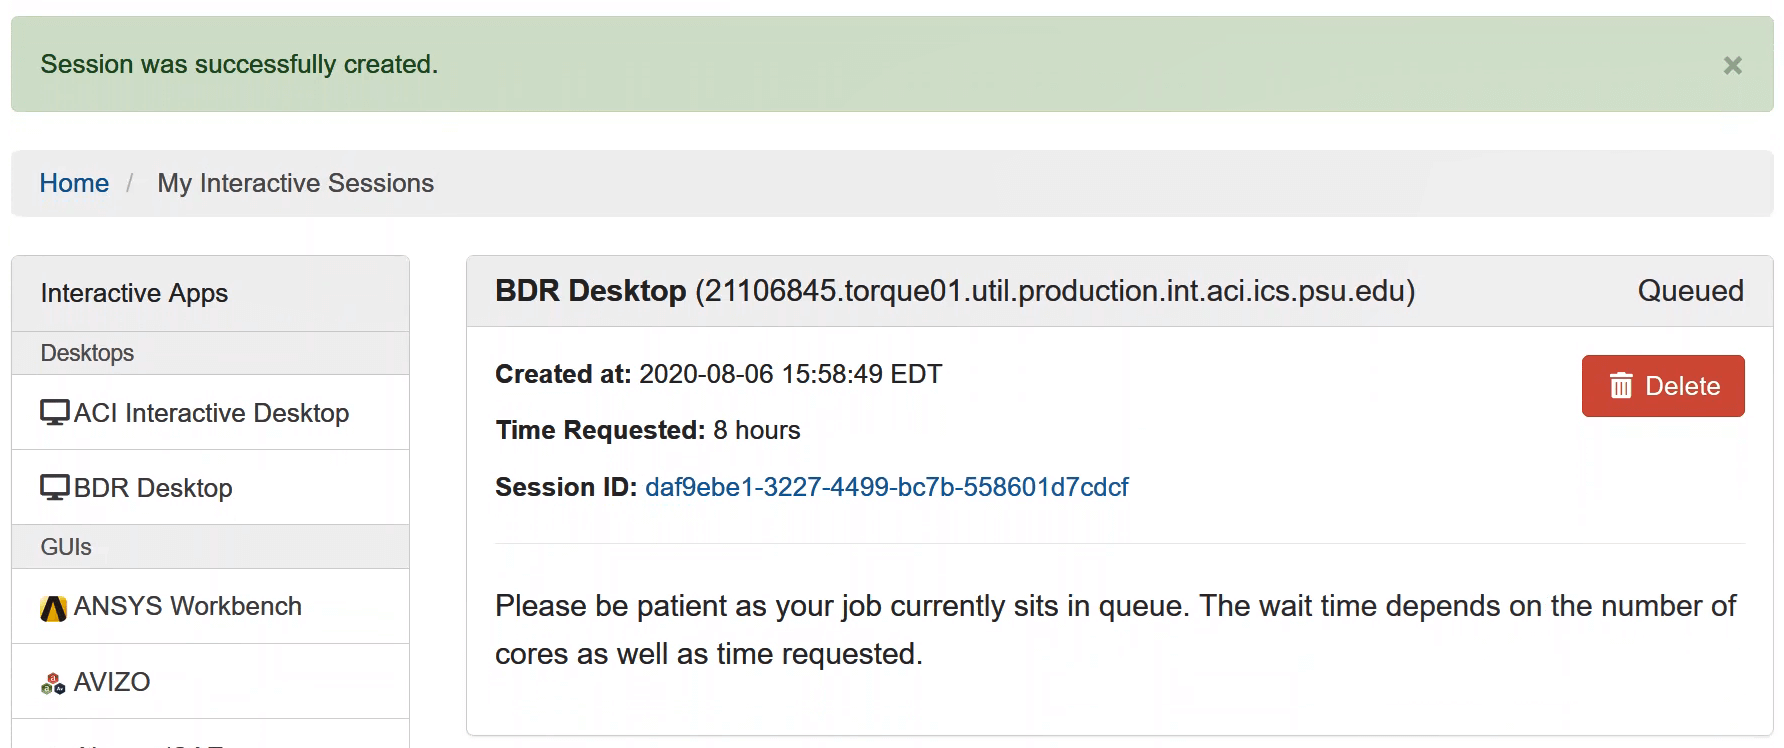
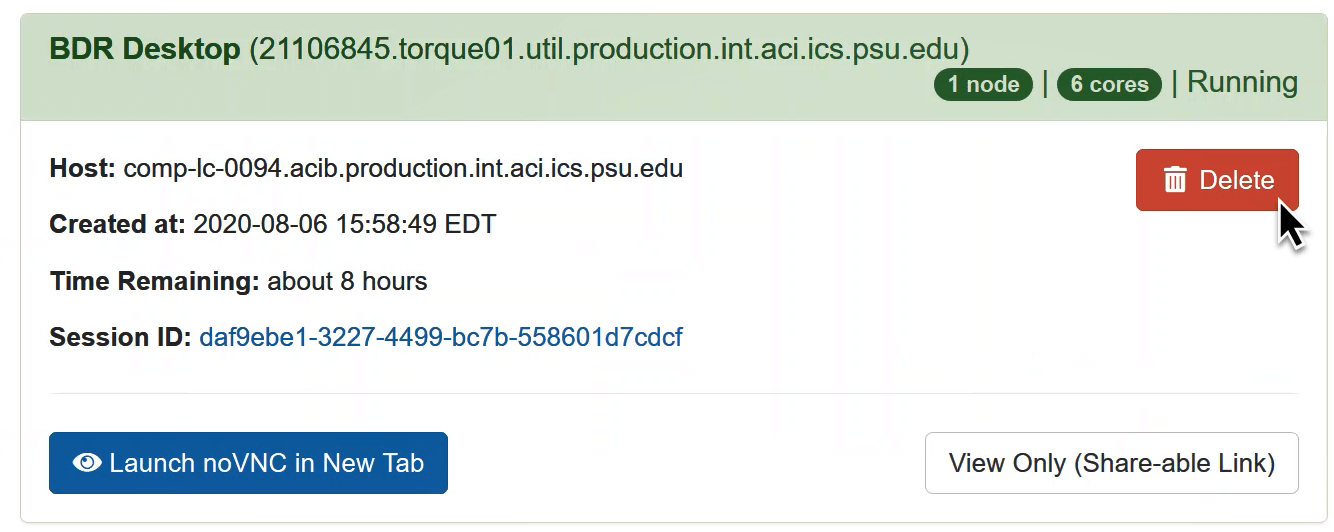
You should see a green banner stating the session was successfully created and below you should see that the session is "Queued". You may need to wait a few minutes for your session to be ready.
-
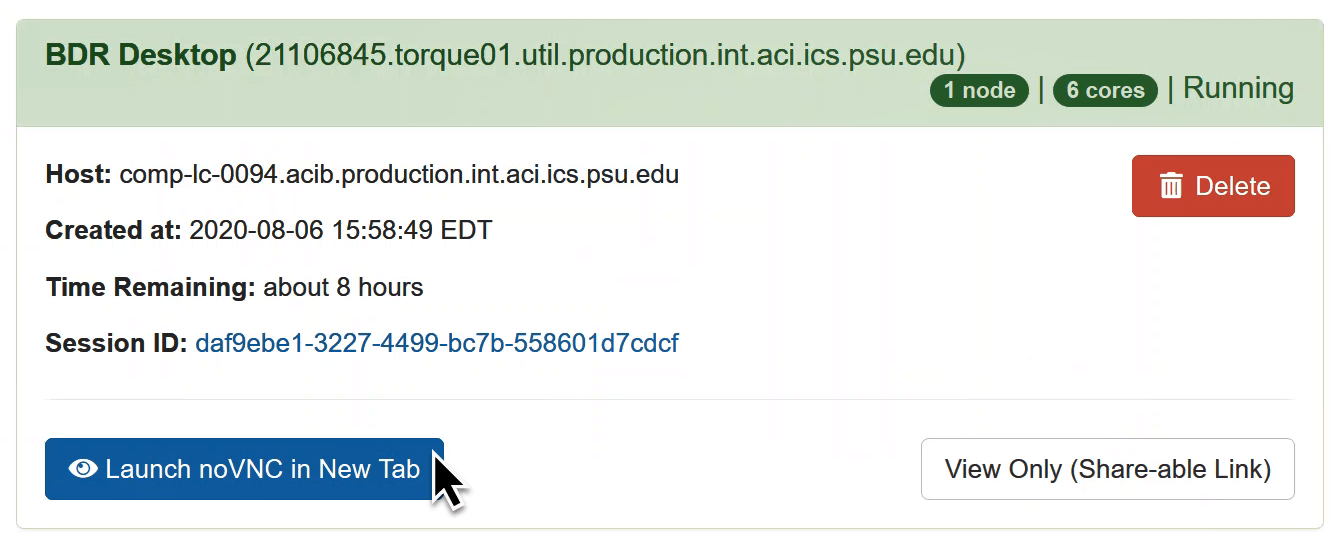
When your session is ready, click on the blue button to start the Interactive Desktop in a new browser tab. Also note the white button that says "View Only". If you need help troubleshooting, you can share that link so that others can view exactly what you see.
-
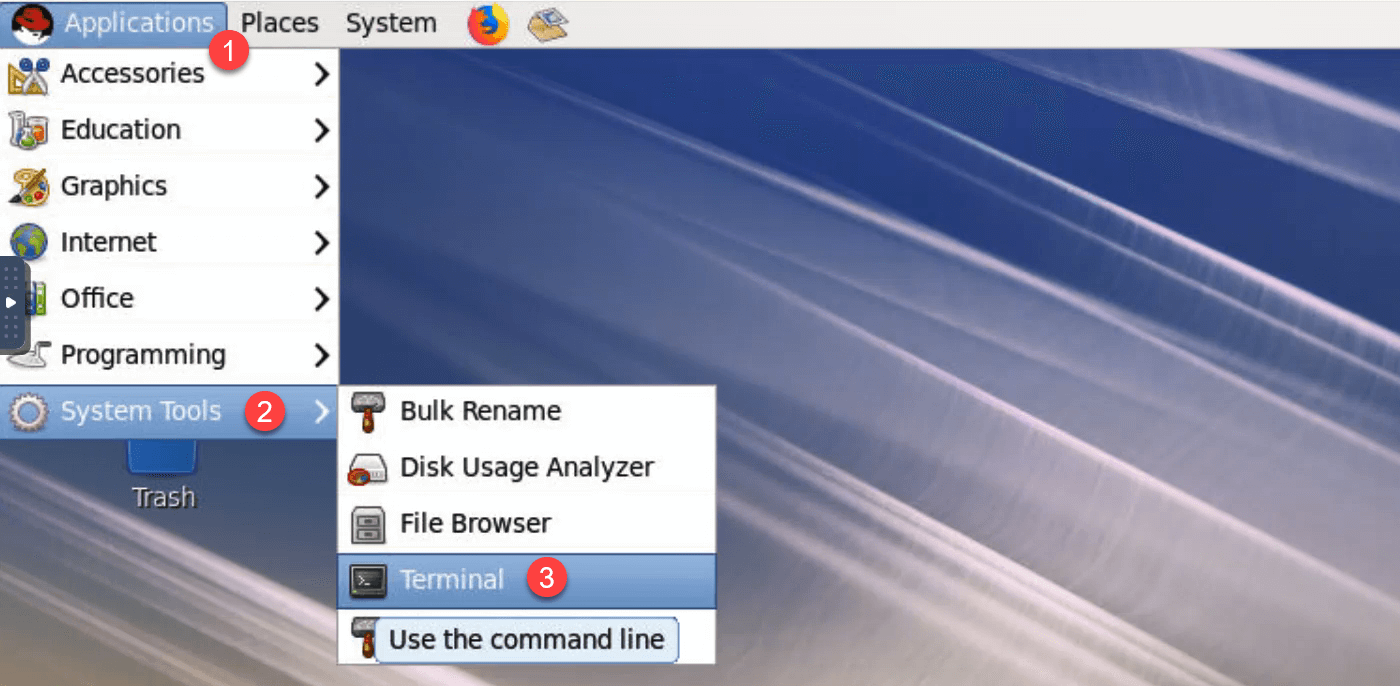
Open the terminal. Click on Applications in the navigation bar, then System Tools, and then choose Terminal.
-
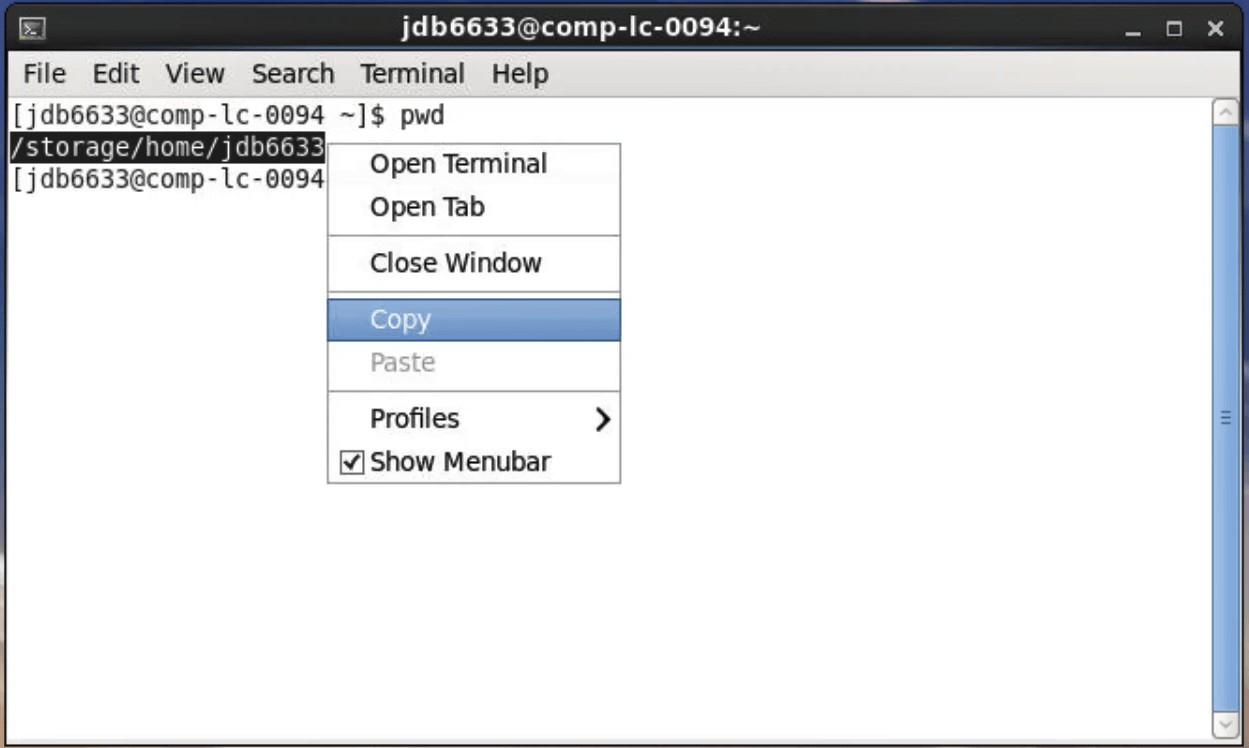
To copy text out of the Interactive Desktop, first right click and choose Copy. You may also be able to use Ctrl+C. This adds the text to the Interactive Desktop's Clipboard.
-
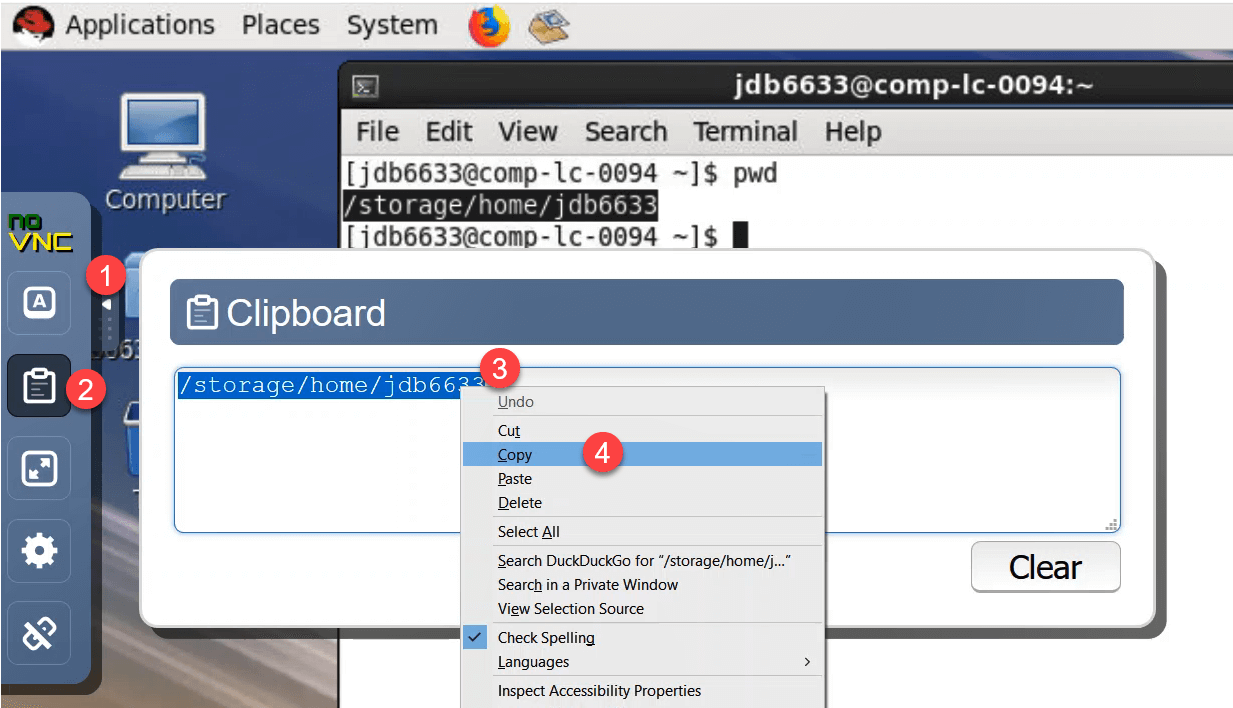
To access the Clipboard, click on the tab on the left-hand side. This will expand a menu. Click on the Clipboard icon to display the copied text. From here you can select the text, right click, and copy it (or use Ctrl+C). Now you can paste this text elsewhere on your computer.
-
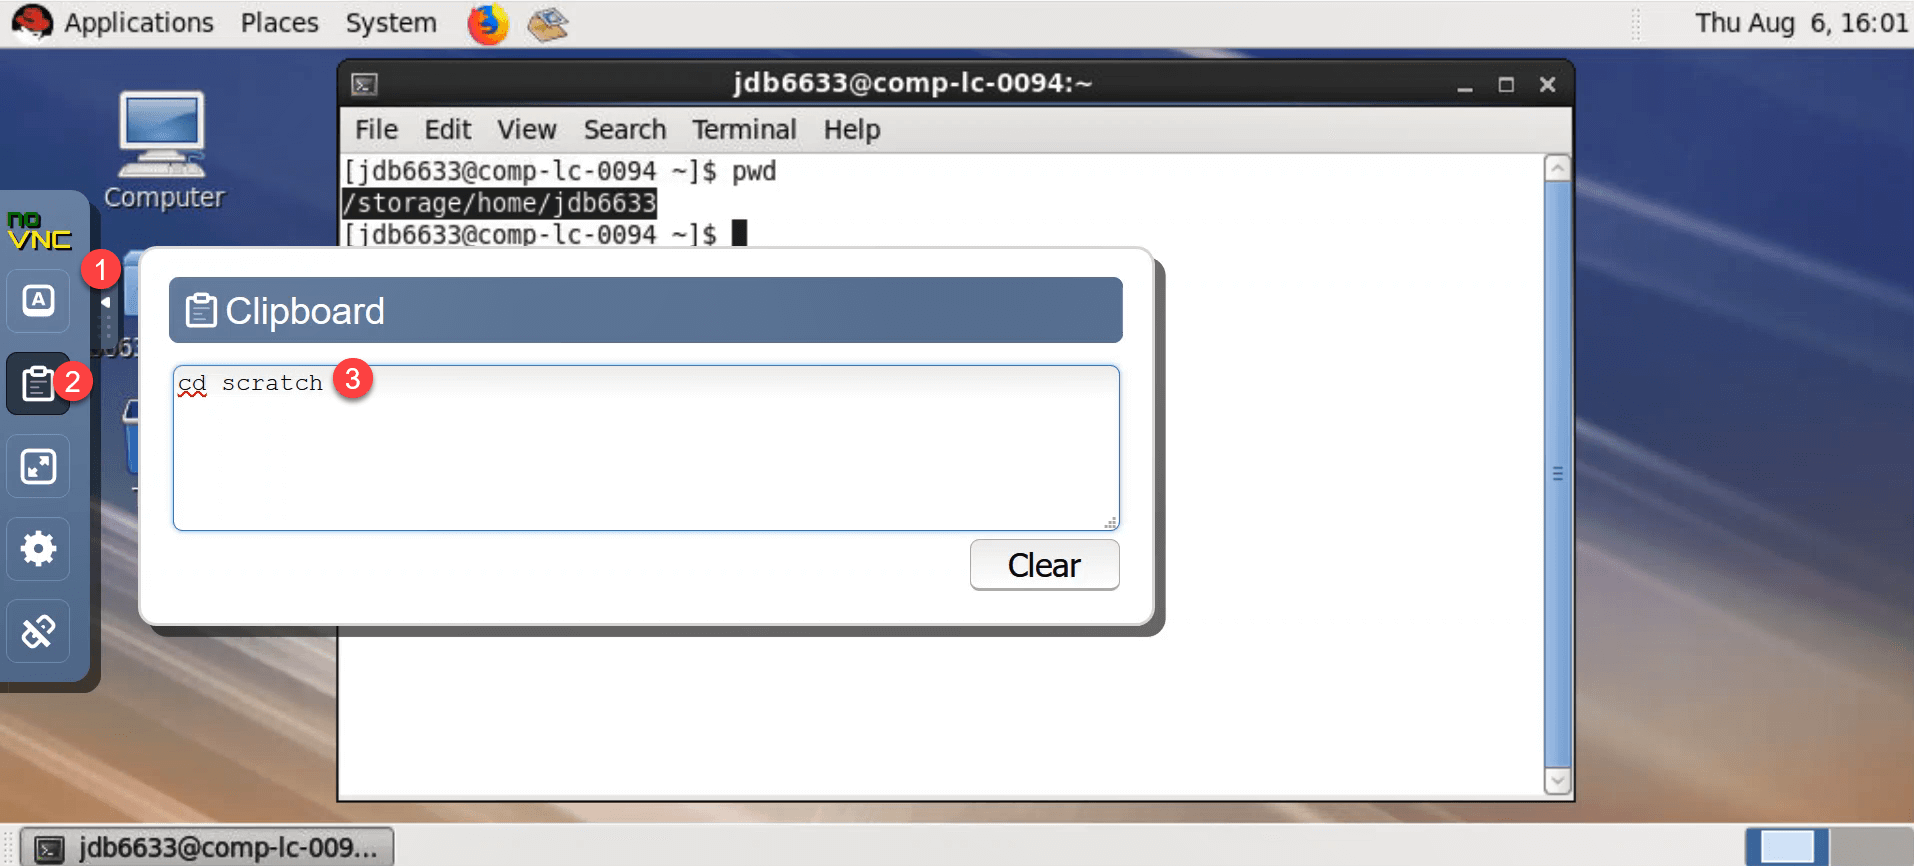
To paste text into the Interactive Desktop, first expand the Clipboard from the left-side menu and paste the text to the Clipboard.
-
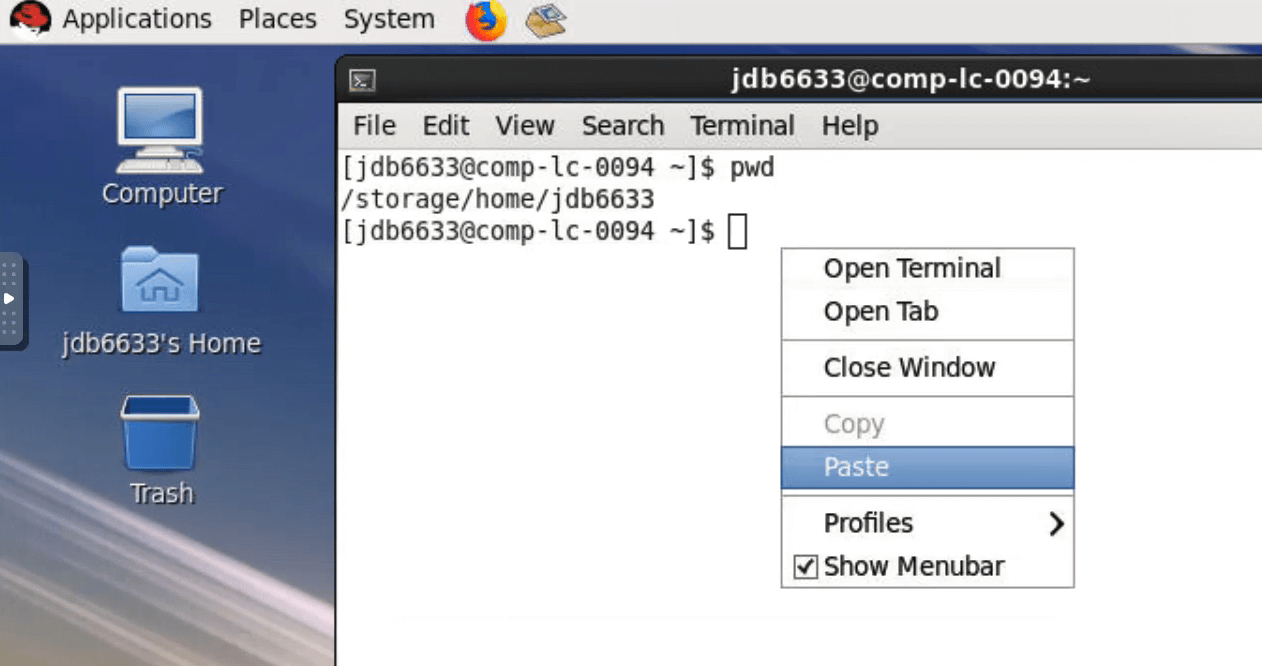
Next minimize the side menu, and paste from the Clipboard into the Interactive Desktop by right clicking and selecting Paste. If Paste is greyed out, try right clicking a second time. You may also be able to use the keyboard shortcut Shift+Insert.
-
If you made it this far, you're ready for the bootcamp! Feel free to experiment more with the Interactive Desktop. When you're finished, go ahead and delete the session to free up computational resources.
Troubleshooting
Current ICDS-ACI users may have settings that interfere with the Interactive Desktop.
Could not connect to session bus: Failed to connect to socket /tmp/dbus-lrVXbCbmFk: Connection refused
This is caused by either a local installation of Anaconda or a lingering temporary directory. If you run into this issue, check the following:
-
Check your
.bashrcfile in your home directory. If there are lines relating to an initialization of Anaconda or loading a Python module, comment them out. -
Check your
.bash_profilefile in your home directory. If there are lines relating to the initialization of Anaconda or loading a Python module, comment them out. -
Check if there is a directory called
.lmod.dor.lmod. If there is, either (a) delete the directory usingrm -r lmod.d(b) move the directory to your scratch workspace or (c) rename that directory to something else.
After checking these, try restarting the interactive session.